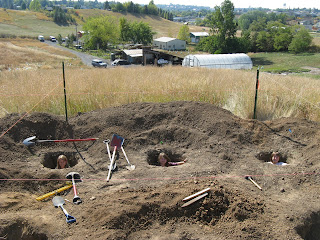
We did find about a dozen of these beautiful salamanders trapped at the bottoms of our holes after only one night. The must have fallen in accidentally and were unable to climb back out. Here you can see me holding one of the little guys...

The children loved the holes, too. We made sure to remove them before pouring concrete... :-)


We added 6" of compacted 3/4 minus gravel to the bottom of each hole.
After measuring and re-measuring and re-measuring, we positioned the footers and sonotubes in their correct relative position and then we backfilled our holes. Of course it felt a little frustrating to fill in the holes that we painstakingly cleared out...


The concrete is reinforced with rebar. We have a grid of rebar inside of the bigfoot footers, raised above the gravel layer by pieces of brick. We have 4 pieces of vertical rebar lashed to a brick and to each other with wire.
Peter developed a simple way of building the rebar mesh using a brick and some wire:

Peter and I mixed 30 bags of concrete with water by hand using a tarp. You place an 80-lbs bag of pre-mix concrete on the tarp, add water, and jostle back and forth like a mixer. When the concrete is mixed in the tarp, then you use the tarp to pour the wet concrete into the sonotubes.

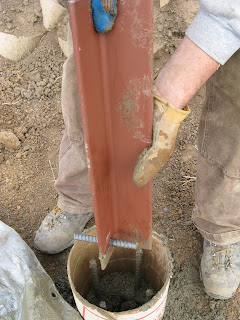
Before pouring all of the concrete, we positioned our angle-iron into the sonotube. The angle iron has a piece of rebar sticking through its base, which will serve as an anchor, helping to resist uplift of the angle iron out of the concrete.


Ultimately, we will weld a custom horizontal plate to this angle iron. This custom plate will attach to the timber sill plate of the artist's studio.

We used some hand-made forms to hold the angle iron in place while the concrete dries. Here, you can see all six finished piers starting to dry.

The pier foundation turned out great!
I think both Peter and I were excited to be done with this phase of the project. Now, we must focus on acquiring logs, milling them, and preparing to cut the joinery this winter.


