Peter and I pulled out the large curved timber which is truly the piece de resistance of this frame. It is a 15' long piece of American elm (Ulmus americana) which I acquired in the Summer of 2008 from East City Park in Moscow. Specifically it came from an area just to the North of the stage in the park, from a tree dying of Dutch Elm Disease. This timber was a large, curved limb of the tree that was left behind by the arborist.
This curved timber is 15' long and about 11" tall and 9" thick. I milled it to a 9" thickness on the Woodmizer bandsaw mill.
I painted the end grain to slow down checking due to uneven drying. The pith (center) of the tree is nearly centered.
Our plan is to reduce the timber to a 10" height throughout, removing the rounded top and bottoms. Peter had the great idea of creating a large template curve by using a thin piece of wood attached to the timbers by screws and clamps at the extreme opposite ends and at the center. We used a 1/4" thick piece of Western Larch that I had intended to use from trim in my cabin. It easily bent into a fair curve. Using an electric Stihl chainsaw and using the larch template as a guide, we cut a series of kerfs on the top surface of the beam.
Using chisels and mallets, we knocked out the remaining wood between the kerf cuts. This is exactly how I make tenons, but this is on a far larger scale.
We smoothed out the surface using a chainsaw and a wide handheld electric beam planer. We got the top relatively squared and smoothed out.
Next, we flipped the timber over and repeated the same process to remove the rounded portion of the beam on the bottom.
This picture really shows off the natural curve in this beam:
We used the wide beam planer to clean things up and smooth the bottom surface.
We are both very happy with how this beam turned out. It is now nearly symmetrical, and we got a near-perfect 10" height on the beam. We need to do a little more milling on this beam to reduce its thickness down to 8", and we'll either drag this timber back out to the Woodmizer mill, or we will use an Alaskan chainsaw mill in my shop.
Wednesday, January 28, 2009
Sunday, January 25, 2009
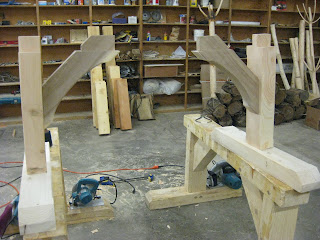
I finished a new framing pony today. I needed a new pony, but I also wanted to try some new things with timber framing. I wanted to use hardwood (American elm from East City Park in Moscow) knee braces, cut decorative curves in the braces with a bandsaw, and use a different mortise/tenon style for the braces.
After cutting the tenons on my braces, the first order of business was to layout my brace curves. I used an excellent ruler that my dad gave me which is centered at 0", allowing you to quickly and accurately find centers.
Using a combination square, I marked the deepest point at the center of the curve.
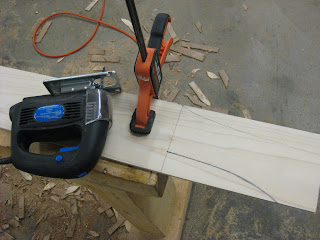
Writing with a pencil on 3/16th" poplar stock that I got from the hardware store, I free-handed one half of the curve and then cut out the curve template with a jigsaw.
By building a template for only half the curve, it was trivial to get the curve to be completely symmetrical.
I bartered some cherry and American elm slabs with a local fine woodworker for time on his bandsaw. The results were nice, as you can see below.
Below, you can see as I start to fit the "timbers" and braces together.
I do not drawbore my joinery. Instead, I use ratched straps to pull the timbers together so tight that the wood starts to deform. Once this is done, I can then bore the peg holes and drive the pegs in. The pegs will forever keep the wood as tight as the ratchet straps did. In my opinion, this is nearly as good as drawboring.
I sanded everything and put a coat of Landark interior penetrating oil finish on everything. This is a 5-species framing pony: Ponderosa pine top, Douglas fir legs, Engelmann Spruce bases, American elm braces, and Locust pegs. With the exception of the pegs, all of this wood was donated by the Moscow community.
The joinery turned out pretty tight. Much better than my first set of framing ponies!
I routed a decorative 45 degree chamfer on pretty much all edges.
Mmm, wood. This American elm brace does a good job of showing off the color differences between the heartwood and sapwood.
The elm braces turned out better than I could have expected.
I've got timbers already cut to length for two more of these ponies. The braces for them are already finished.
The finished product.
Friday, January 23, 2009
Starting work in the shop...
I spent some quality time cleaning and reorganizing my timber framing shop in order to start cutting joinery for the PCEI Artist's Studio Project.
Below, you can see a single stickered pile of timbers. This pile of timbers is the entire PCEI Artist's Studio frame! Rafters, posts, beams, sill plates, and top plates are all there!
The timber with the painted ends is the large, curved beam made from American Elm from East City Park here in Moscow.
Humidity in the shop is very high (91%) mainly due to: 1) poor ventilation 2) a leaking roof 3) these green timbers releasing their moisture. Fortunately, it is cold enough to prevent mold growth on the timbers. Just to be sure, I use a box fan to constantly circulate air around the stickered timbers. Even with the high ambient humidity, this helps the wood dry and stay mold free by alleviating stagnant air.
Pegs!
I like my pegs (treenails) a certain way. I do not like tapered pegs. They look bad, as you can see gaps in the peg and peg hole. Even when drawbored, they have a tendency to get pushed back out as the wood settles and shrinks. They are traditional, and have their place, but I don't like them.
Perfectly round dowels would look good, but they don't work. Pounding a 1" dowel into a 1" hole during raising day sounds miserable. The peg will invariably seize up, especially with variations in humidity and shrinking, etc.
I prefer octagonal 1" diameter hardwood pegs where the pointy edges of the octagon are approx 0.06"-0.08" wider than the .99" wide, flat surfaces of the octagon. The idea is that the sharp edges will dig into the sides of the peg hole but will not seize. The peg hole is completely filled, and the peg itself looks nice.
For previous projects, I bought precision-made white oak pegs from Grand Oaks Timber Framing in Tennessee. I've been very happy with these. However, I found a source of octagonal pegs, exactly how I like them, from Cabin Creek Timber Frames in North Carolina. They sell Octagonal pegs in either Walnut or Locust. I bought 100 Locust pegs from them and I'm really pleased.
The locust pegs are in the box. The white oak pegs are in the bucket.
Locust on the left, white oak on the right:
Locust on the top, white oak on the bottom. Tapering an end with a sander helps drive the peg (and looks good). I like how the locust pegs are tapered on both ends, allowing the timber framer to decide which side to drive in first.
We'll use these beautiful locust pegs for the PCEI Artist's Studio.
Subscribe to:
Posts (Atom)